With grateful thanks to Bill Davies and Rarebits4classics, PO Box 1232, Calne Wiltshire SN11 8WA for the article
With the exception of those equipped with Rotoflex, the universal joints in the rear suspension of Triumph Herald based cars, have to do considerably more work than those in the propshaft. As well as transferring drive to each rear wheel, the halfshaft forms the lower link of the suspension system. As such, the universal joint has to deal with a number of stresses, so small wonder that it is a component which often gives trouble. The first obvious symptom of a failing halfshaft UJ is a rhythmic ticking, the rate of which varies with the speed of the car. This is worse as the car free-wheels or you have your foot off the throttle.
Getting underneath the car to check the UJs is unlikely to be helpful – don’t expect to find any physical play. By the time any movement can be felt, the UJ will be in a seriously dangerous state and liable to disintegrate – if you’ve let things get this bad you deserve a slap!
Rather than getting dirty beneath your car, simply driving it is a far better way to trace the ticking UJ. The ticking noise will only happen when there is no power being put through the driveline.
If you think about this it makes sense – putting a driving force through the UJ will tension the spider against it’s bearing surfaces, so it won’t tick. When there is no power, the spider isn’t under tension and can rattle quite happily in it’s bearing cups. Turning a few corners will soon tell you which UJ is ticking. The driveshaft to the outside wheel will be turning faster than the inside shaft as the car corners. This will release tension on the inside driveshaft’s UJ, while maintaining tension on the outside driveshaft. So if you get a ticking on righthand corners, your righthand UJ is at fault. Likewise with lefthand corners. If both UJs are on their way out then things will be very noisy indeed..
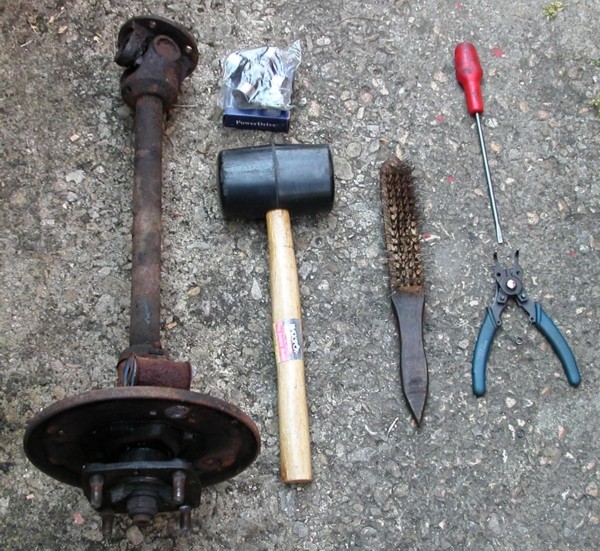
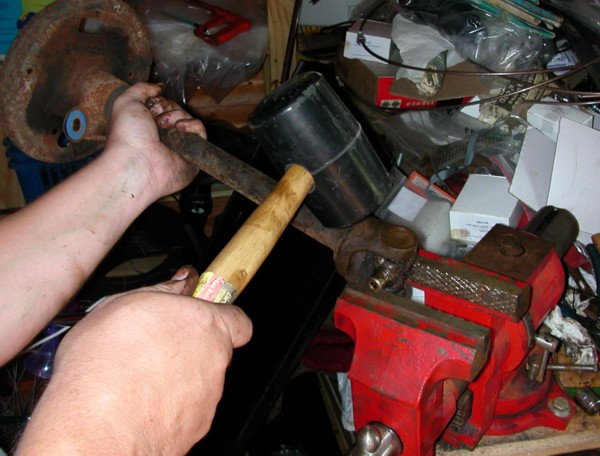
To replace the UJ you will need a few essential tools. A good vice will make an awkward job very straightforward. You will also need a wire brush, a soft faced hammer or mallet, circlip pliers and an old socket which is slightly smaller in diameter than the bearing caps of the UJ.
You will also need a grease gun, as fitting non-greasable UJs is in my opinion a complete waste of time. I won’t go into the process of removing and replacing the halfshaft, as this is covered in plenty of detail by the factory workshop manual and by Mr. Haynes, even if there is more reliance on big hammers and swearing than either would have you believe.
I remove the UJs using a slightly modified version of the technique favoured by John Kipping. The technically correct method of pressing out each bearing cap in a vice may be fine with new components, but it can be a nightmare with anything which has seen 40 years of use.
Begin by cleaning away any grease and dirt, then wire brush the UJ and surrounding area – pay particular attention to each of the circlips and bearing caps. Spray a little WD40 or Plus Gas onto each circlip to help with removal. Once this has had a few minutes to penetrate, I add a few drops of 3-in-1 oil.
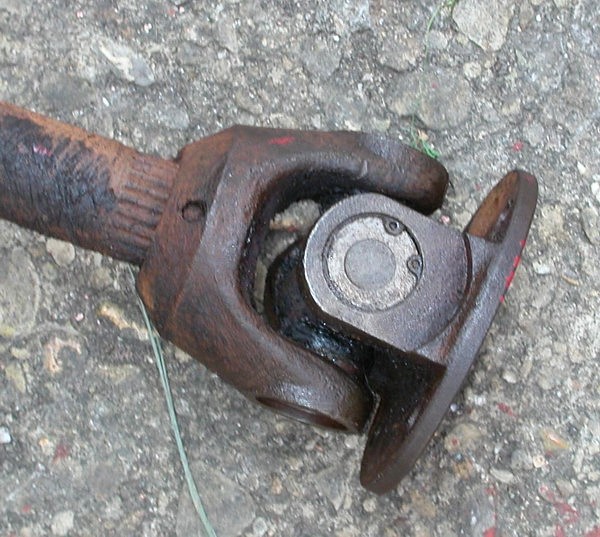
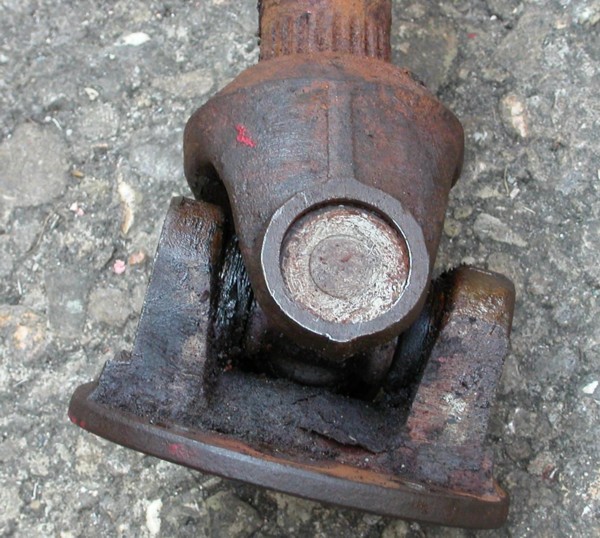
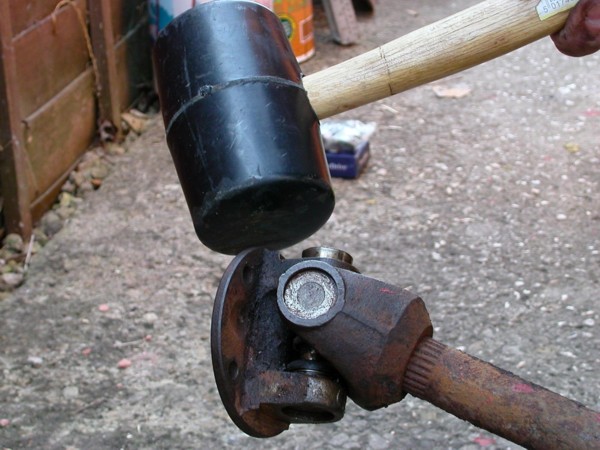
It helps to mark the flange and yoke in some way to maintain the correct orientation on reassembly – I usually score a line on each component. With the shaft assembly supported on the bench, take the socket and place it over one of the bearing caps. Hit the socket with the soft faced hammer, the shock will help loosen the circlip while driving the cup in as far as it will go. Remove the circlip with the pliers – a small screwdriver may be helpful to help lift the edges. Repeat this for each of the 4 circlips.
With all of the circlips removed, hold the shaft in one hand with one of the bearing caps in the flange uppermost. Strike the flange downwards with the soft faced hammer, popping the bearing cap upwards. Once there is sufficient of the cap outside the flange, turn the shaft through 180 degrees and repeat for the opposite bearing cap. You will now be able to remove the flange from the UJ and remove the caps by gripping their ends firmly in the vice.
Similarly remove the bearing caps from the yoke by supporting the bare ends of the spider across the vice, while striking down on the yoke inboard of the cap. With a little practice, this method gets a UJ stripped in 5 minutes, though that doesn’t include the circlips – no shortcuts with those I’m afraid.
Once the UJ is dismantled, reassembly is pretty much as per the manual, but I have a few hints:
” Keep the UJ in the fridge for half an hour before it’s used. This will keep the bearing grease firm so that the rollers don’t fall out.
” Don’t use any additional grease upon assembly – it will make the job very messy. Far better to use greaseable UJs and grease when assembly is complete. Keeping everything clean this way, will even allow those who are so inclined, to give the rebuilt shaft a coat of paint before wielding the grease gun.
” Remember to take out the grease nipple and fit a blanking plug when done. Some UJs take a metric nipple, so be sure to get the correct blanking plug from your supplier.
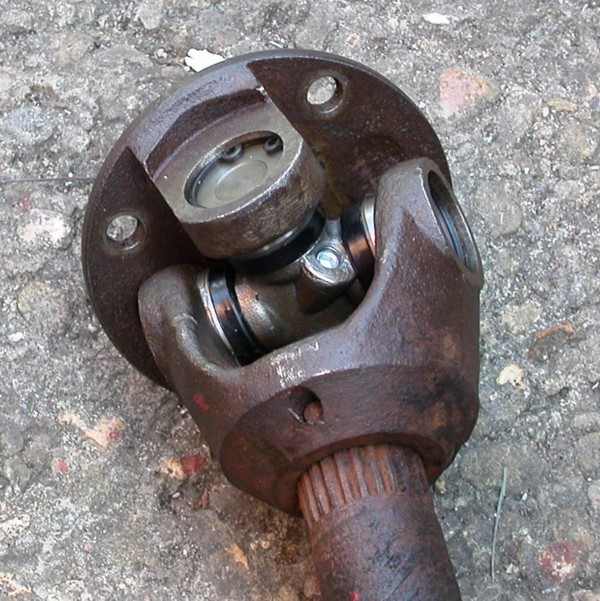
Remember that unlike the propshaft UJs, those on the halfshaft must be set tight. A correctly installed halfshaft UJ will be quite tight but smooth when the flange is moved by hand – this is off the car of course. Triumph specialists will be able to supply circlips in various thicknesses to take up any endfloat across the UJ. The factory supplied circlips in 4 different thicknesses, but most specialists have settled on just 2 sizes, .0615″ and .0645″.
Endfloat is best determined by trial and error. First fit the standard circlips as supplied with the UJ, then tap the flange in all 4 directions with the soft hammer so that each bearing cap is pushed out against it’s circlip. If the joint feels loose in any direction, take out one of the relevant circlips and replace with the first oversize. Re-check for play and repeat on the opposite bearing cap. If there is still play, fit the next oversize circlip to one of the caps. This part can be a little tedious, but failure to do this correctly will result in your new UJ ticking as loudly as the old one, as the UJ rocks back and forth between bearing caps. Once you’ve changed a few joints you will develop a feel for which circlips you need, but there will always be some element of trial and error.
